Yep - As the title says, I am expanding into eBay.
I currently have 2 pieces that I have put up for auction, I'm hopefully putting a couple more up tonight. I don't know how well this will work but since the pieces aren't being used at all it can't hurt to try!
http://myworld.ebay.co.uk/patchworkbimbim
This is my page - go check it out and pass it on to any one else who you know is looking for some new cushion covers! If they don't like the ones that are up online, please put them in contact with me and I can make them custom made!
Isn't this exciting!?
Sunday, May 5, 2013


Sunday, April 28, 2013
Owls are in this season...
As my lovely title says, owls are in this season. Everywhere you go you find owl cards, owl pajamas and, most importantly, owl cushions!!
Yes, those that know me know that I of course looked at these cushions and went... HEH! I can do that!
So off I set, with a plan to make an owl cushion. Soon after, my mum provided me with a pattern for an owl - however the plan changed here - I was now making an owl door stop. I decided the pattern wasn't big enough to make an owl cushion at this point!

Fabric was chosen, pattern pieces cut out (slightly wrong if you have a look at the wings, but hey, hes my wonky owl)! Sewing it together, well, this posed problems. First off, I was instructed to use 5mm seams. If I do this again, which I intend to with a few changes here and there, I would increase the size of the pattern pieces to allow for 1cm seams. It would make life a LOT easier.
I then stuck the eyes on once the main body was finished. Again, I would change this next time - I would sew the eyes on earlier in the process. (Admittedly, the instructions suggested this, but I ignored it as I didn't have any decorative ribbon or edging like they used).
So really, that's my fault but, adding to this, I would also sew the beak on at this point. I decided to go for a flat beak as the 5mm seams (as mentioned above) caused me many many problems when trying a 3D beak.

Other than that, the rice went well, although I need a little bit more in there, he's not quite full yet and i've already sewn him up. Oooppsss. But I can easily open him up to put more in!
So, what do you think? Cute huh!? Keep checking for the next trial owl. Hopefully he'll be a bit easier to make! :O
Yes, those that know me know that I of course looked at these cushions and went... HEH! I can do that!
So off I set, with a plan to make an owl cushion. Soon after, my mum provided me with a pattern for an owl - however the plan changed here - I was now making an owl door stop. I decided the pattern wasn't big enough to make an owl cushion at this point!

Fabric was chosen, pattern pieces cut out (slightly wrong if you have a look at the wings, but hey, hes my wonky owl)! Sewing it together, well, this posed problems. First off, I was instructed to use 5mm seams. If I do this again, which I intend to with a few changes here and there, I would increase the size of the pattern pieces to allow for 1cm seams. It would make life a LOT easier.
I then stuck the eyes on once the main body was finished. Again, I would change this next time - I would sew the eyes on earlier in the process. (Admittedly, the instructions suggested this, but I ignored it as I didn't have any decorative ribbon or edging like they used).
So really, that's my fault but, adding to this, I would also sew the beak on at this point. I decided to go for a flat beak as the 5mm seams (as mentioned above) caused me many many problems when trying a 3D beak.

Other than that, the rice went well, although I need a little bit more in there, he's not quite full yet and i've already sewn him up. Oooppsss. But I can easily open him up to put more in!
So, what do you think? Cute huh!? Keep checking for the next trial owl. Hopefully he'll be a bit easier to make! :O
Sunday, April 7, 2013
Rainbows only last for so long!
Well here it is: The finished throw. For the past couple of days while i've been finishing it I kept thinking
'I don't want to give it away!'

But, I made it for my friend, and so she shall have it!
I added the border and the white back, sewed it all up and made the transfer! I did want to put either batting or wadding inside, however, I couldn't find a cheap enough filling, and as it was only going to be used as a throw, I decided it didn't need it.
I added the border and the white back, sewed it all up and made the transfer! I did want to put either batting or wadding inside, however, I couldn't find a cheap enough filling, and as it was only going to be used as a throw, I decided it didn't need it.

It also looks really pretty when you hold it up against a window and look from the back - kinda stained glass don't you think?
Here are the three other posts I have written about this project!
Either way, I now no longer have a project :(
Anyone want to help me here??
Wednesday, February 27, 2013
We're going on a bear hunt!
Well, actually, the title should be i've been on a bear hunt! Would you like to know why?
Because of these beautys!!:
Because of these beautys!!:

The blocks are called Bear Paws!
These cushions were made for someone who had asked for 2 cushion covers to be made for a Christmas present to give to his Mother. Sadly, I couldn't make them for Christmas day, however I got them to him as soon as possible after the holidays were over!
I was only given 2 pictures of the room they would be used in to get colours and ideas from, and wasn't given sizes of cushions - basically I was given free reign to create what I wanted! The colours I chose were so easy to put together, it took me less than 10 minutes in the shop! I was amazed. I came out of it thinking 'I clearly need to have colours in mind before I go in more often!'
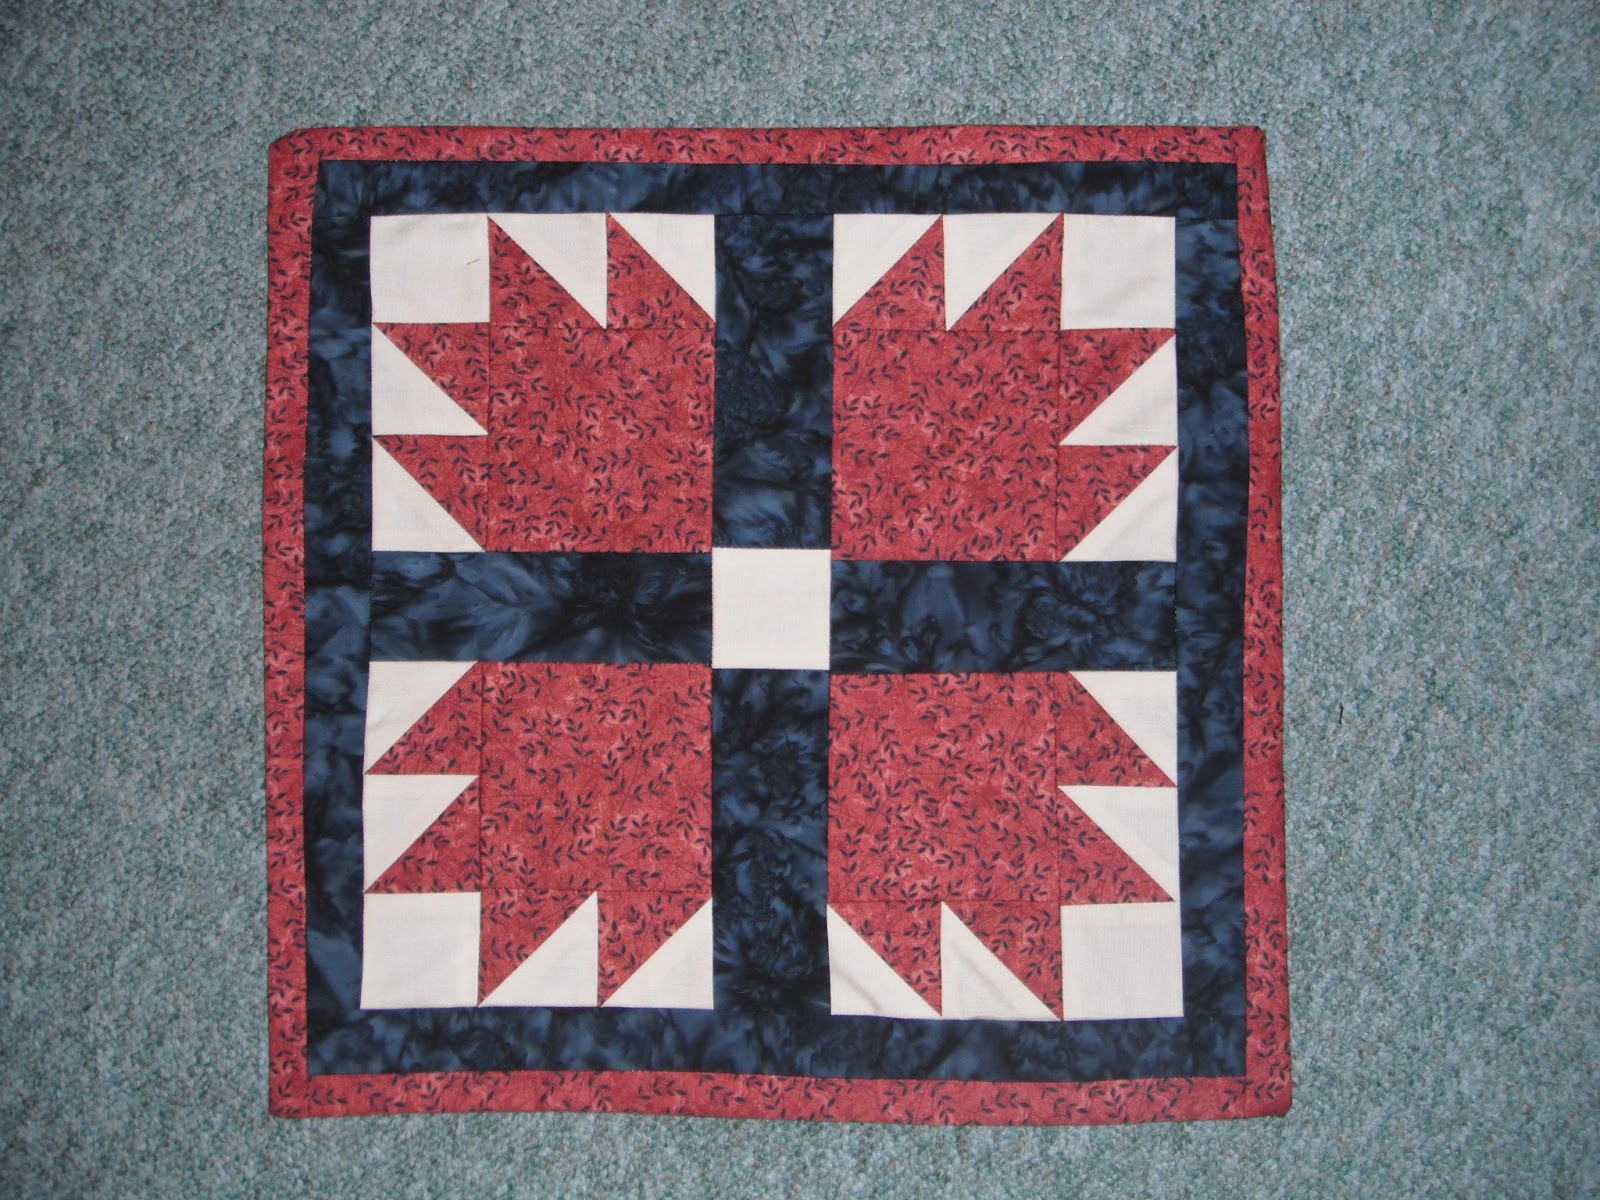
I really am particularly proud of these cushions as they are some of my best work piecing and seam wise! There were only a couple of minor mistakes (although, if you would ask my Dad he'd make them seem like World War 3 was about to start! I, in response, told him he needed to flush his head down the toilet if he couldn't see how good they were!)

Either way, I wanted to get permission to put them up here on the blog and as I now have it, I can share them with my lovely followers. I hope you like them!
Tuesday, February 26, 2013
The front is done!
Hi Guys,
To those who saw the last post, I'm making a throw for a friend of mine. The last post only showed 3/5 of the front, however I now have all 5 rows sewn together :D
I do need to put a white border around this and then also sew on the back, but that shouldn't take me too long once I have the fabric.
A trick of mine (and probably a lot of other people) to get cheap fabric is to buy bed sheets. Depending on where you get them from, you can get a king size sheet for about £6 compared to about £15 for 2.5m of fabric from a reasonable priced shop!
It's brilliant. However, I haven't found a good shop here in Swansea yet so I shall wait until I am back home for Easter to finish the project and pass it on!
Here are the pictures:
To those who saw the last post, I'm making a throw for a friend of mine. The last post only showed 3/5 of the front, however I now have all 5 rows sewn together :D
I do need to put a white border around this and then also sew on the back, but that shouldn't take me too long once I have the fabric.
A trick of mine (and probably a lot of other people) to get cheap fabric is to buy bed sheets. Depending on where you get them from, you can get a king size sheet for about £6 compared to about £15 for 2.5m of fabric from a reasonable priced shop!
It's brilliant. However, I haven't found a good shop here in Swansea yet so I shall wait until I am back home for Easter to finish the project and pass it on!
Here are the pictures:


Tuesday, February 12, 2013
3/5 of the way through!

It's gone really easily, and is really fun to do since i'm not having to worry about matching up the fabrics! Its like a blessing in disguise. I thought I wouldn't be finished much before the Easter holidays, but clearly I was wrong. The only problems I'm going to have are the border, the back and getting it to my friend.
I had a helper as well. I was sewing while someone else did the ironing of the seams. We had a nice little team going on and everything was going very quickly! Once there was nothing more to iron I got him to match the squares for the next rows! It was brilliant.
Either way, I hope this picture does it justice!
Thursday, February 7, 2013
A pot of gold at the end of the Rainbow!

And this is my next project!
A friend of mine wants a throw for her bed, and not being able to find one as awesome as mine is going to be, she asked whether i'd make her one! Technically she is commissioning me to do this, which is so very exciting :D
I provided a couple of different rainbow ideas, keeping it simple since rainbows make everything funky without the need for lots of intricate patchwork patterns. The one above is the one that she liked most, and as such, is the one that she will get.
Each square is going to be 14cm x 14cm with a border of 5cm each side. This will take the entire throw to a size of 150 x 150cm.
I've already got most of the patches cut out (eager beaver that I am), I just need to cut out both blues and the purple. I decided to use a couple of fabrics for each colour, to give the throw some variation so I hope it all looks good!
I provided a couple of different rainbow ideas, keeping it simple since rainbows make everything funky without the need for lots of intricate patchwork patterns. The one above is the one that she liked most, and as such, is the one that she will get.
Each square is going to be 14cm x 14cm with a border of 5cm each side. This will take the entire throw to a size of 150 x 150cm.
I've already got most of the patches cut out (eager beaver that I am), I just need to cut out both blues and the purple. I decided to use a couple of fabrics for each colour, to give the throw some variation so I hope it all looks good!
This is my second commissioned piece so i'm very excited to do this :D It's always better to have an idea of what to work towards at the end, and also to have someone to give it to, rather than it being sat in my room for months on end!
Subscribe to:
Posts (Atom)